
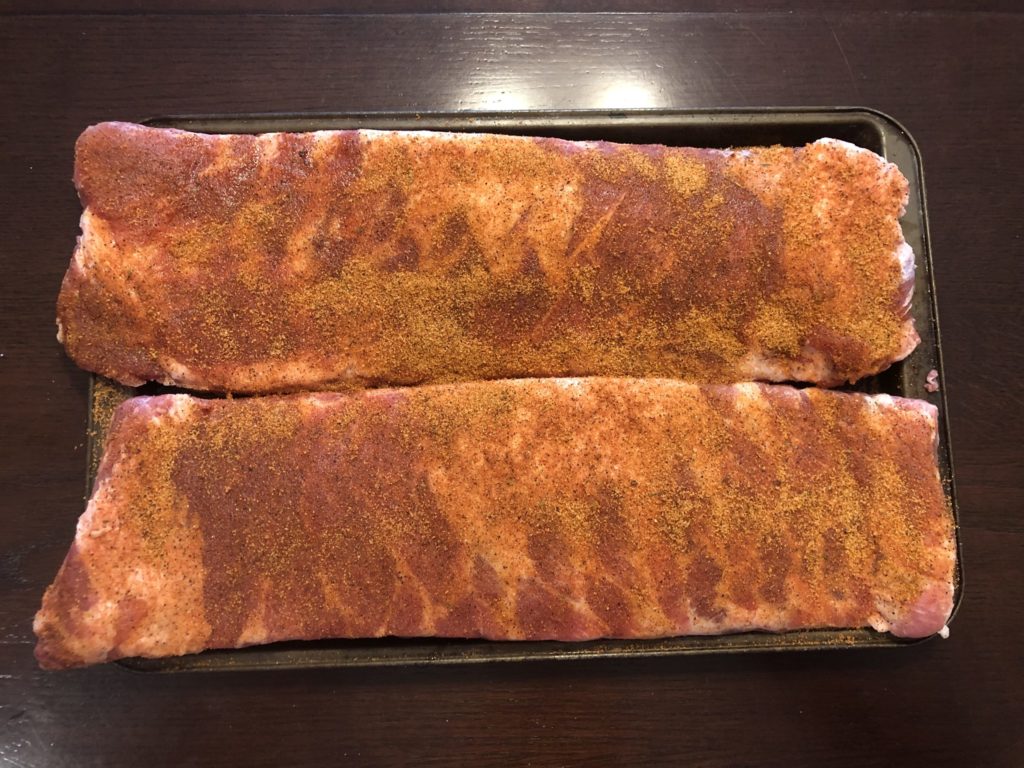
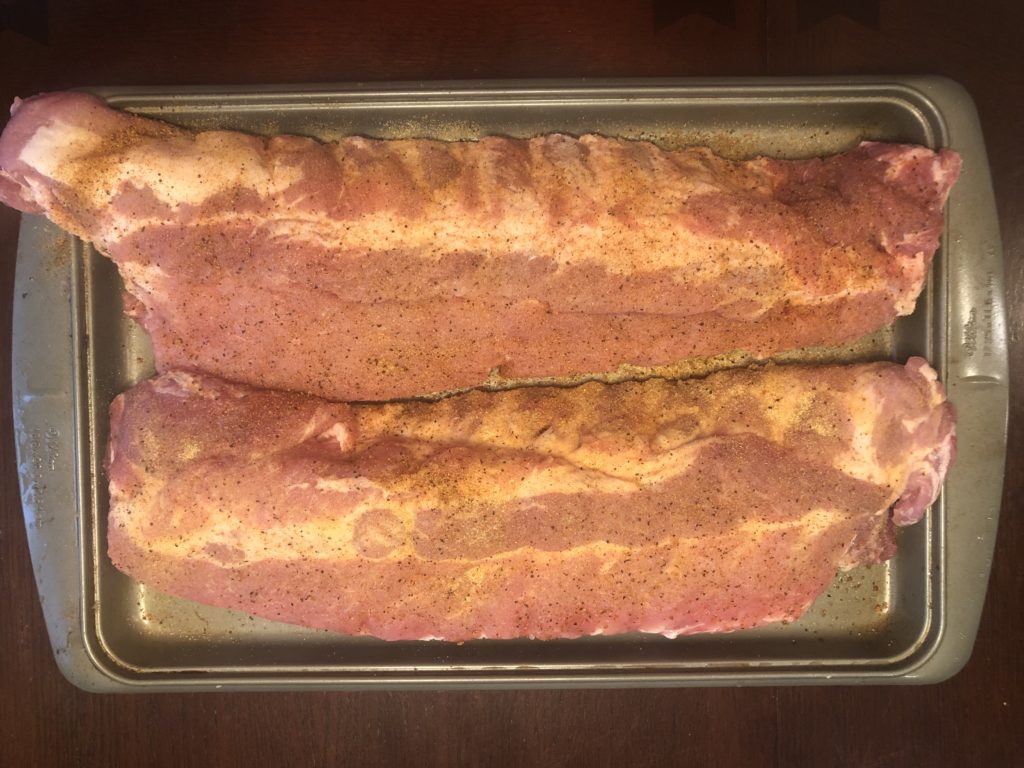
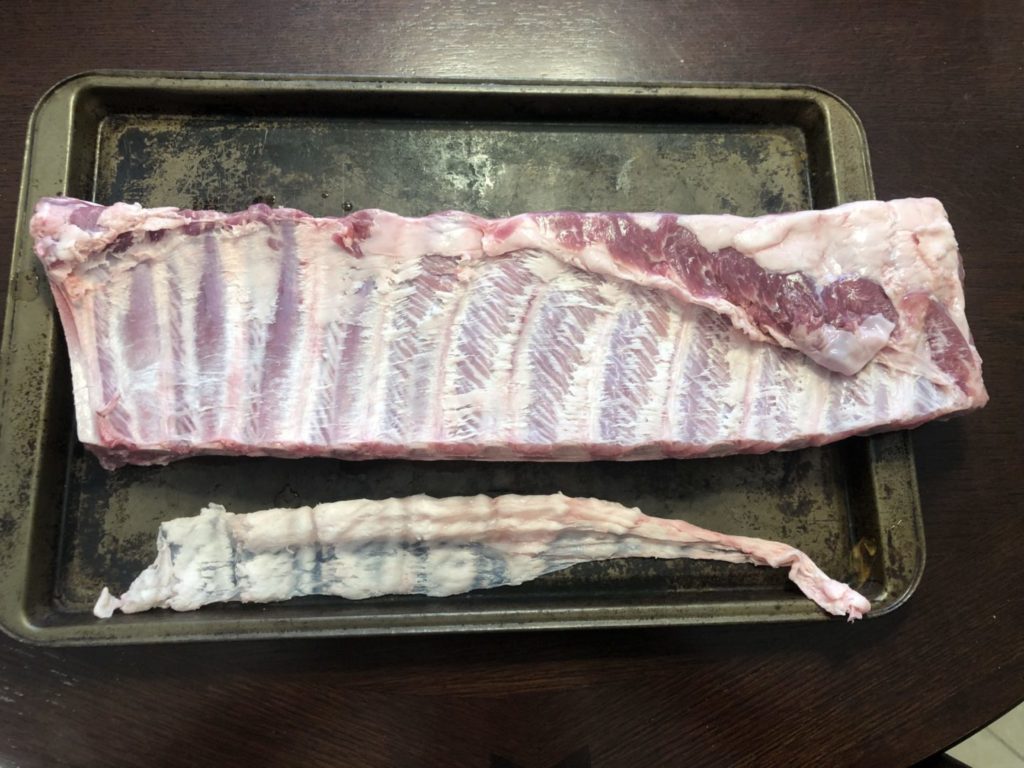
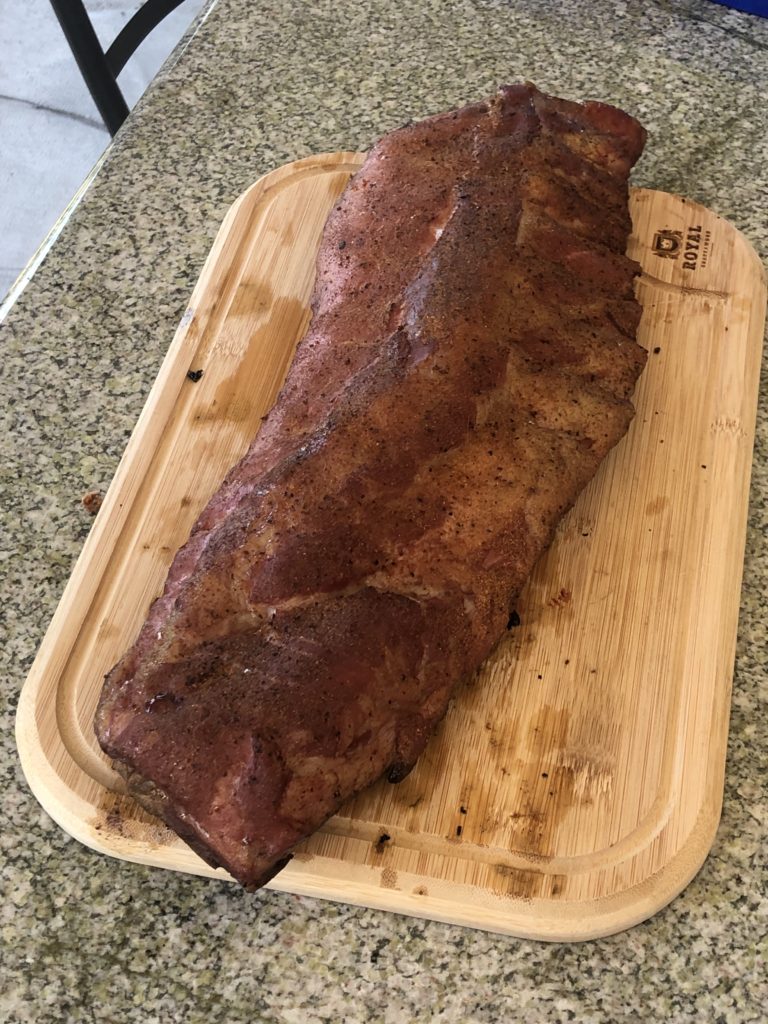
One of my favorite meats to smoke is plain ole’ pork ribs. If doing spare ribs I prefer the St. Louis Style which basically just trims the ends off so you have rib bones and not all of that cartilage that holds them together. So just meat, and bones, and in an easy to eat package. I also love me some Baby Back ribs. Both ribs are delicious and it would be hard to pick a favorite. You can see in the below pictures both types of ribs. You may notice the seasoning is different, this isn’t because they are two different types of ribs (I use same seasonings on both). I am constantly trying new things, or going back to old things, and this is a prime example of that. Pictures taken a couple weeks apart. On the left are St. Louis Style ribs seasoned heavily with a rub that has brown sugar, garlic powder, paprika, pepper and a few other things. They were good ribs, and turned out well. On the right are Baby Back ribs, seasoned with garlic powder and lightly with a Texas style pork rub (very lightly!). I was alternating my cooking method so wanted to get more of a meat / smoke flavor so I can see how it turned out. This is typical for me, always trying new stuff. And yes, sometimes it doesn’t work out!

St. Louis Style Pork Spare Ribs Baby Back Ribs
My basic building block for ribs has evolved over time, and my current system has been refined for the smoker that I have. It is only slightly different as far as temps, times and methods as my prior smoker but it is different. Mainly because I can control temps so much easier now I can really stick to the time schedule and I’m not constantly adding or subtracting based on the temps creeping up or down. My method started based on the popular 3-2-1 method you might read about on the internet. It’s pretty common and is a good place to start. The 3-2-1 is just a way to say “3 hours unwrapped, 2 hours wrapped, 1 hour unwrapped”. So 6 hours in the smoker. I started doing this but quickly changed to make it simpler. I ended up with something more like a 4-2 and skipping the 1. It’s one less thing I have to do. I do not use any sauce during smoking, that kind of defeats the purpose if you cover the meat with sauce it prevents the smoke from getting in. I save that for the end.
STEP 1 – Prepare the ribs!
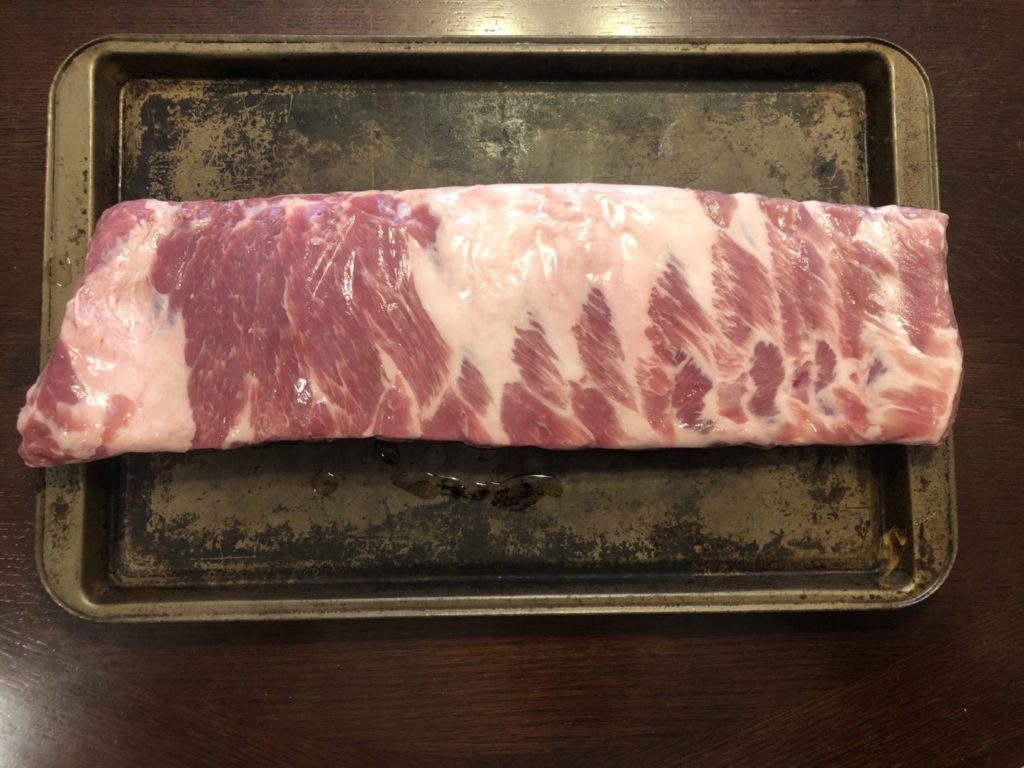
First thing you want to do after removing from the packaging is to rinse the meat and if necessary trim off any excess meat or fat. In the first picture you can see these are St. Louis Style ribs, so they have already been trimmed by the butcher and don’t require any of this. If I’m doing full slab spare ribs, or baby backs, I often have to trim little bits off or sometimes big bits. Doing this gives you a nice clean surface to work from.
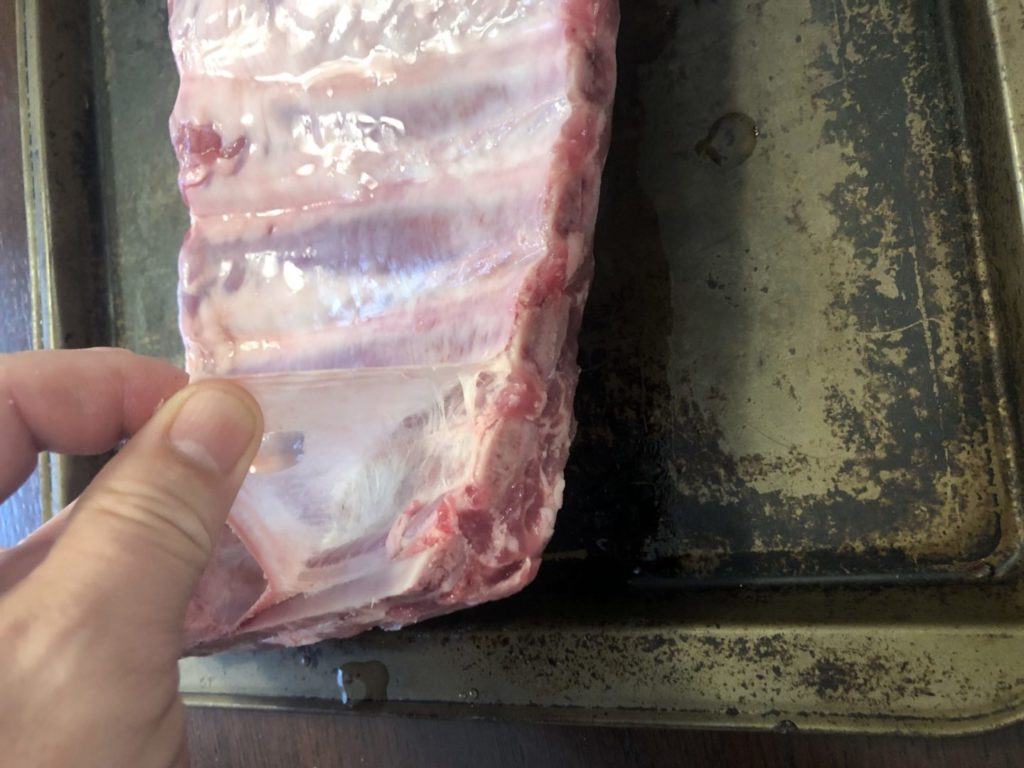
Next I pat it dry with paper towels to try and make it less “slippery” when removing the membrane. I’ve heard some people say they leave the membrane on, others say it must be removed to get smoke in both sides of the meat. The latter makes sense but I can’t say I’m any expert, I do know when eating the ribs I can tell if the membrane has been left on and I prefer them without. It’s not that hard to remove if you use a paper towel to grip the membrane near one of the end near a bone. In the pictures to the right I’m holding the membrane with my hand, but I used a paper towel to get it started. The meat and membrane are slippery and without the paper towel it is difficult to remove the membrane.
STEP 2 – Season the ribs!
This is a bit subjective. As discussed earlier I am constantly changing my seasoning, trying new ones, and making new ones up. This isn’t because I don’t like the ribs I’ve made, it’s more because I’m always on the lookout for something better. I’ve done enough of these to know if I stopped the first time I made ribs that I liked, I would be missing out on a bunch of refinement that I’ve gone through.
There are pretty much two schools of thoughts I have for the ribs. One is a heavy dry rub to try and infuse flavor into the meat, and the other is a light rub to try and let the meat and smoke flavor stand on it’s on. My ideal rib is dry rubbed but not too heavily. I worked at a Winn-Dixie when I was younger in the meat department and our manager Vance always did his ribs on the minimalist side. He would add a touch of garlic powder and nothing else. He would take them down to the deli and have them cook it in their rotisserie for us to give out samples. It’s safe to say 90% of the sampling was done by us and this was without any sauce. Just delicious, tender meat.
Whatever you do be mindful of how it may interact with the full cook process. A lot of rubs contain brown sugar, which is nice, but also burns. Too much heat and you’ll end up with a burnt taste. Also I do enjoy some spicy rubs but not everyone does so I generally leave the spice out of the rub and keep some spicy BBQ sauce on hand.
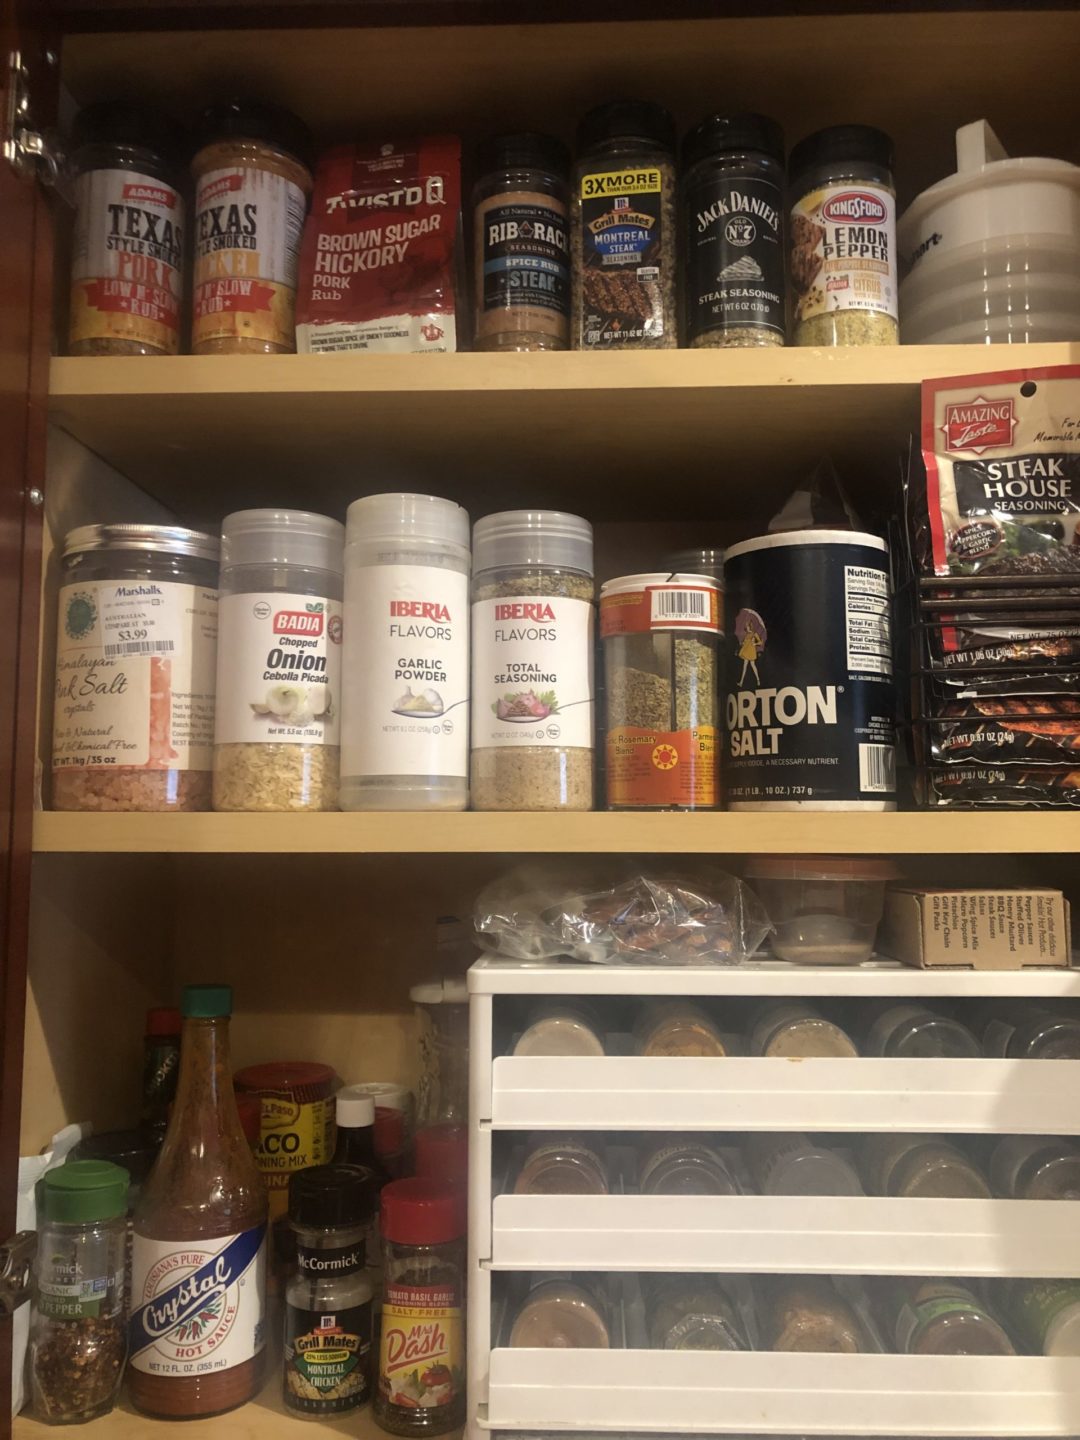
In this image you can see what our spice cabinet looks like. These are just the visible ones there’s layers deep on this stuff. Top is pretty much all BBQ seasonings and is really just the stuff I am using today. Next month I will try new stuff. I also have some large containers of the rubs that I like and use the most that are in a different cabinet and not shown here. I really like the Cattlemens Smokehouse Rub for cuts of beef. I’ve learned to buy small packages to try stuff, then if I like something I’ll buy the larger sizes. This is because I’ve got a few large tubs of seasonings that I don’t like. I’ve learned I’m not a salt man. A little to season? Love it, but so many of these are heavy on the salt and I’ve had meat too salty for my taste. The Lady Beckman loves salty foods so it’s fine by her but some time ago I tried cutting out salt and your taste really does adapt, now a lot of processed foods are just too salty for me.
STEP 3 – Smoke the ribs!
Every smoker is different. These times and methods work for me, on my smoker, with my setup. Your setup, times, temps, etc. may need to vary but this is a good spot to start. First thing I do is bring the smoker up to 225°F using my favorite wood pellets. For now I’m using a mixture of Lumberjack Pecan and Hickory Charcoal pellets. While my smoker is warming up I prepare an A-MAZE-N tube smoker. What is that? You can find them online, and under many different brands / names. Basically it’s a 12″ long tube with holes in it that you can stuff with pellets to burn and generate extra smoke without extra heat. I use only the Hickory Charcoal pellets in this as it seems to produce more smoke than some of the other varieties. I use a torch to light it and once it starts smoldering and generating thick smoke I put it in the chamber. I also usually add a pan with water in it to the bottom rack to keep moisture up, but really I’m not sure if it’s necessary for this new smoker but it was something I did previously so I’ve continued doing it.
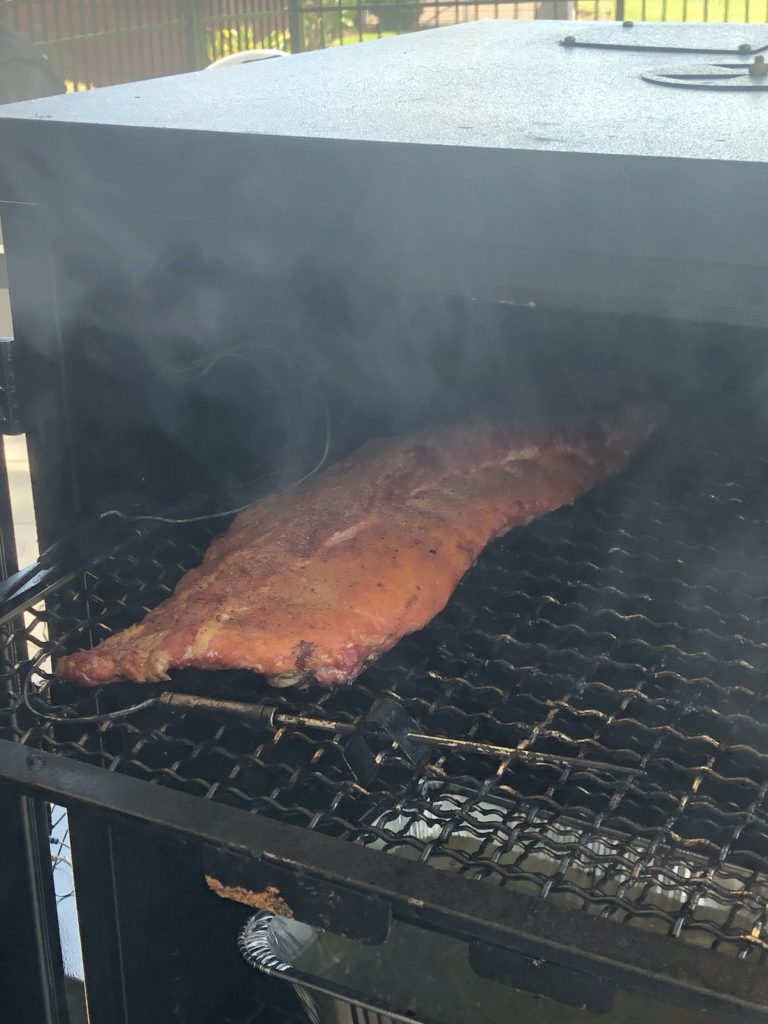
Once everything is up to 225°F I add the meat. I try to leave plenty of room around the meat so that the smoke can circulate, and I put it in bone side down, then I close the door. I run a four probe digital meat thermometer but I don’t use them in the ribs, I just use the probes in the top and bottom of the smoker to get an idea for the temps although my smoker has a digital readout and three analog thermometers on the door. I’ve noticed there is a difference it temp from top to bottom that varies depending on how I have my vents set. I have a side vent to promote recirculation but I’ve noticed that tends to build more heat in the top of the smoker. If I open the top vent I can get a more even temp through the smoker, so I usually leave it open at least half way. For the first four hours of the smoke I try to leave the ribs alone. I don’t spritz, I don’t put any mopping sauce on them, I don’t do much to them just let the smoke infuse them with flavor.
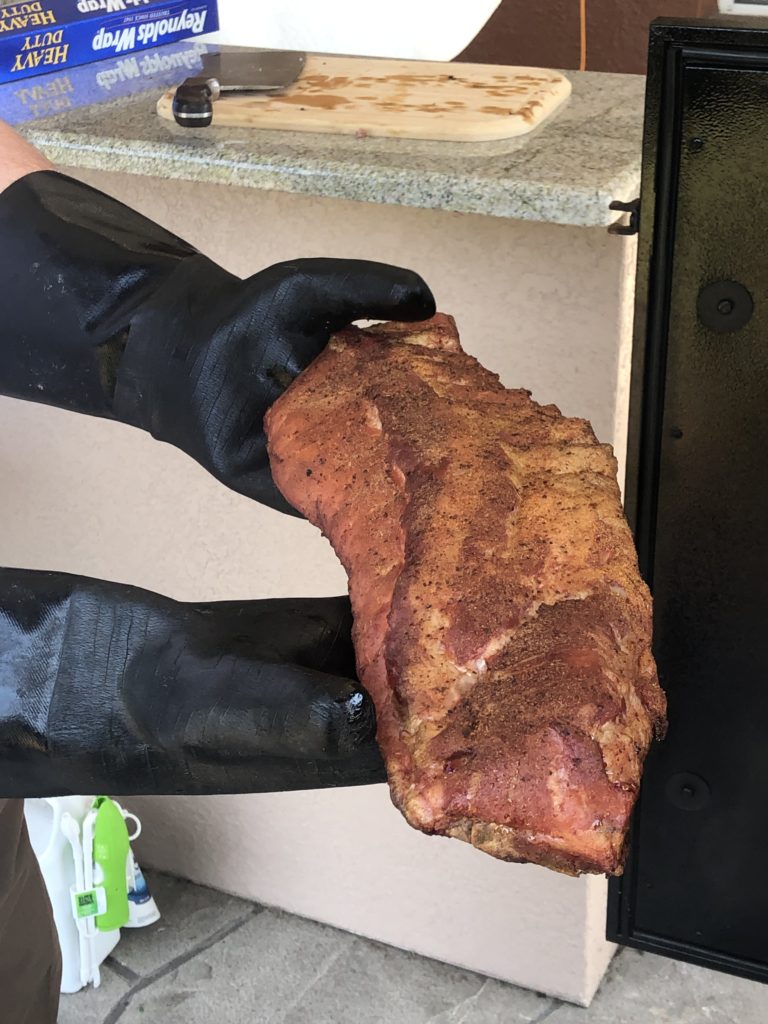
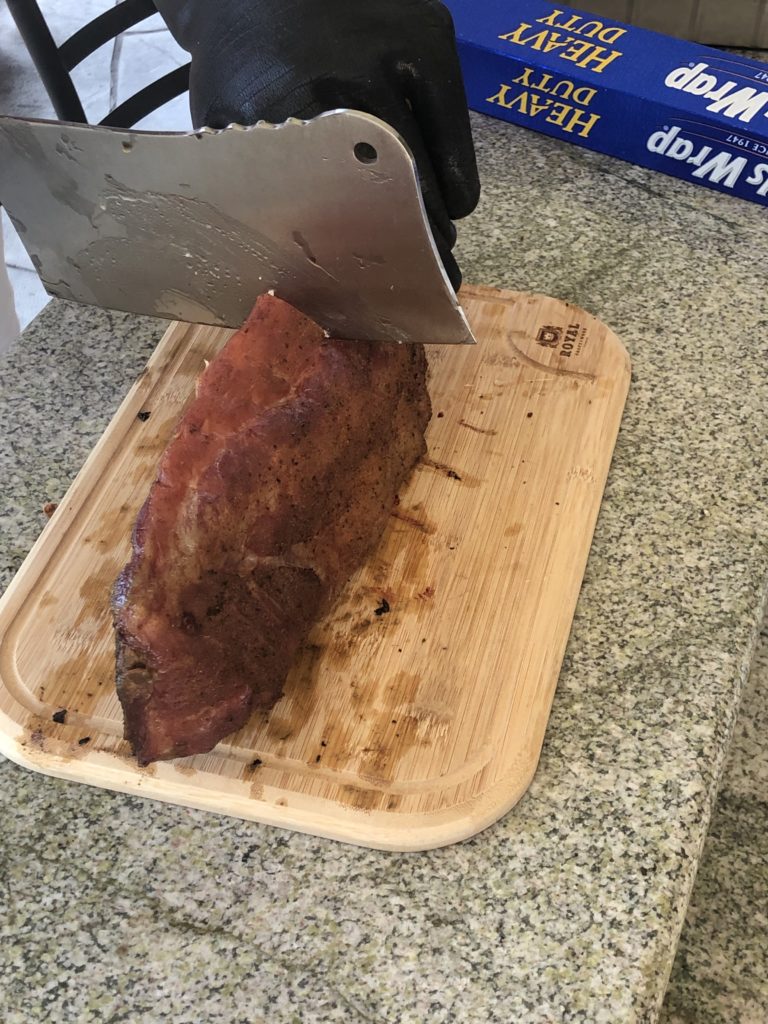
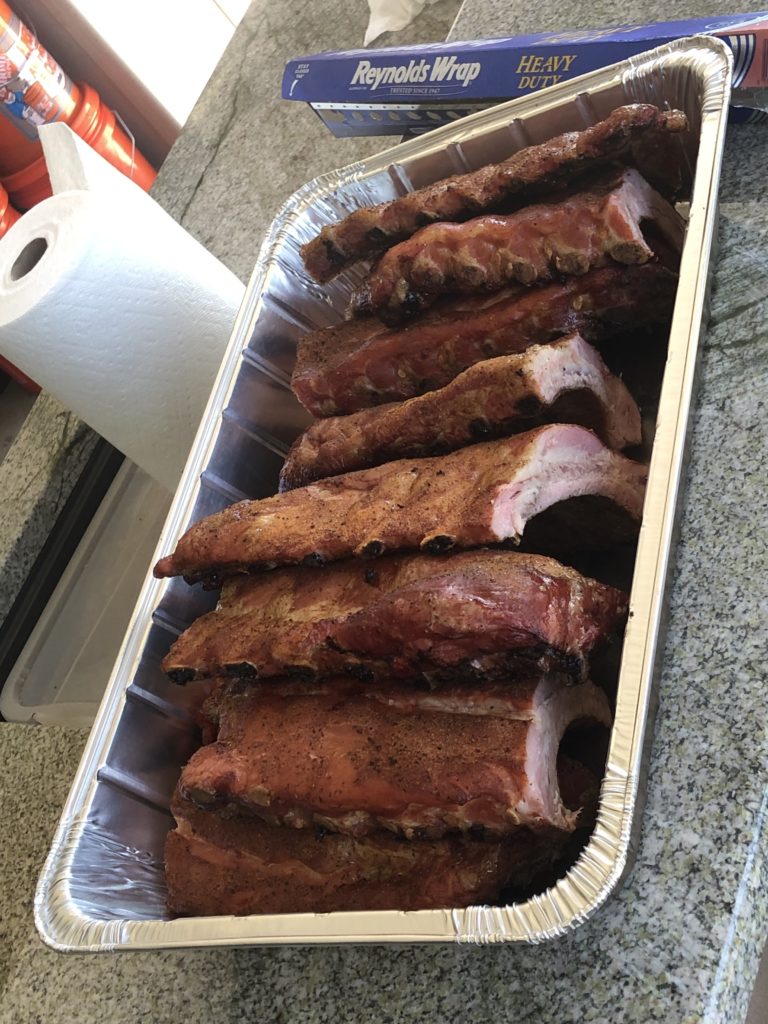
At the four hour mark I pull out the ribs and wrap them in foil. Usually I’m a bit lazy and will grab a bit aluminum serving pan and put the ribs in there. For this I cut them in half because they fit better short-ways and I can get about 6 racks in one pan then I cover it. It’s just quicker to do this than wrap each rib individually which is what I did for years. Once wrapped, back in the smoker for another two hours. During this two hours the fat really renders out and pools in the bottom of the pan. The meat starts to pull back from the bone and it gets very, very tender. Be careful when picking up the ribs as they might fall apart on you!
I want to mention something about times and temps. Since I’ve gotten this pellet smoker I am trying new settings, and the most recent that seems to have worked well is I lower the first four hours to 215° and I raise the last two hours to 235°. I wanted to raise the temp of the last two hours to get ribs to render out more of the fat and give me a better end product. The reason I adjust both temps, but not times, is because I want to keep it four hours unwrapped in full-smoke, so by lowering this temp I can raise the latter temp and not worry about overcooking the ribs. The Baby Backs that I did this past weekend were done this way and came out great.
STEP 4 – (optional) Chill and Grill
What is this Chill and grill? One upon a time I needed to cook a bunch of ribs for a congregation gathering. In order to smoke my ribs, get loaded up and get to the event early enough to setup I would need to start the ribs at 1am (10am was the start time for the event, lunch at noon). Getting up at 1am isn’t gonna happen unless the house is on fire so I decided to smoke them the day before and just refrigerate them overnight, then throw on the large grill at the park we were hosting the gathering at. In doing this I discovered that the 20 minutes they spend on the grill warming up really puts the finishing touch on the ribs. Prior to this I would go from smoker to grill then to the table. The meat would sometimes be more tender than what I wanted, but everyone seemed to love it. This Chill and Grill method the ribs were still incredibly tender, but not quite fall apart tender. It’s like they kind of “set” up a bit, like letting a roast rest before serving or something.
Now I almost always smoke my ribs the day before. If I’m having a gathering on Saturday, as I get home from work I fire up the smoker and get the ribs going. Plus, it makes the “day of” much easier on me and I can spend less time cooking and more time with friends and family while they are over. You just throw the ribs on the grill at the same time as your chicken, burgers, sausages or whatever else you’re making to warm them up. This is also the time I throw a little sauce on there to get it to caramelize a bit right before serving. So much simpler than trying to time everything just right!
So that’s how I do my ribs… Today… It is an evolution, and this last round where I went back to just garlic powder with VERY VERY light rub was refreshingly delicious. I may start backing off on the rub a bit, for now. But still, on the horizon, lies the brisket. I keep looking for a reason to cook one on this new smoker, maybe over the coming months I can find me one!
And one last note… This is twice now I’ve cooked ribs with the intent of making this post. And twice that I took pictures making it, but by the time I pull the final ribs out I forget, and it slips my mind. So, no pictures of the completed ribs, the closest I got was just before wrapping. When they come out I drain the juices, put the foil back on top and put in the fridge. And the day-of when family was over last thing on my mind was this post… If I ever do manage to get some pictures, I’ll update this post 🙂
Comments